


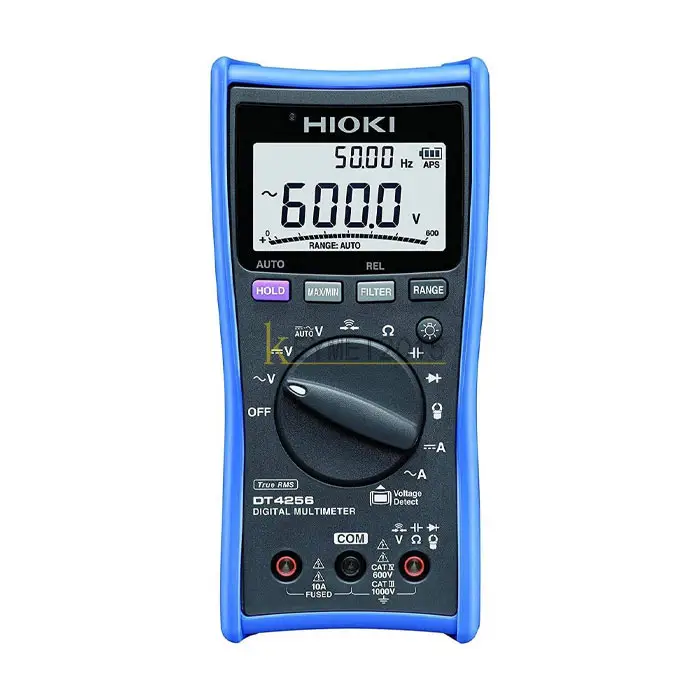


Hioki Dt4256 Digital Multimeter
$0.00 (excl.VAT)Kyoritsu KEW 1009 Digital Multimeter
$0.00 (excl.VAT)Hioki DT4282 Digital Multimeter
$0.00 (excl.VAT)testo 835-T2 – High Temperature IR Thermometer
$2,361.00 (excl.VAT)Testo 175 T1 Temperature Data Logger
$765.00 (excl.VAT)Testo 104-IR Food Safety Thermometer
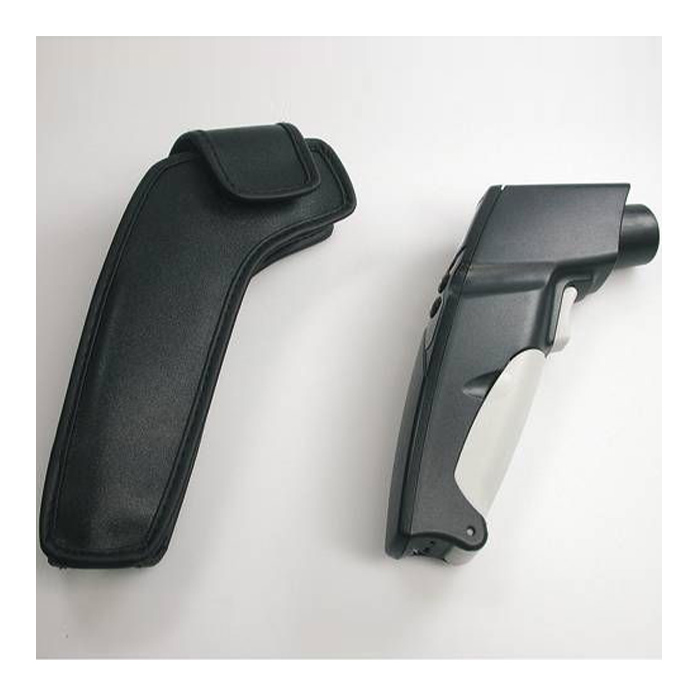
$687.00 (excl.VAT)testo 830 t1 infrared thermometer
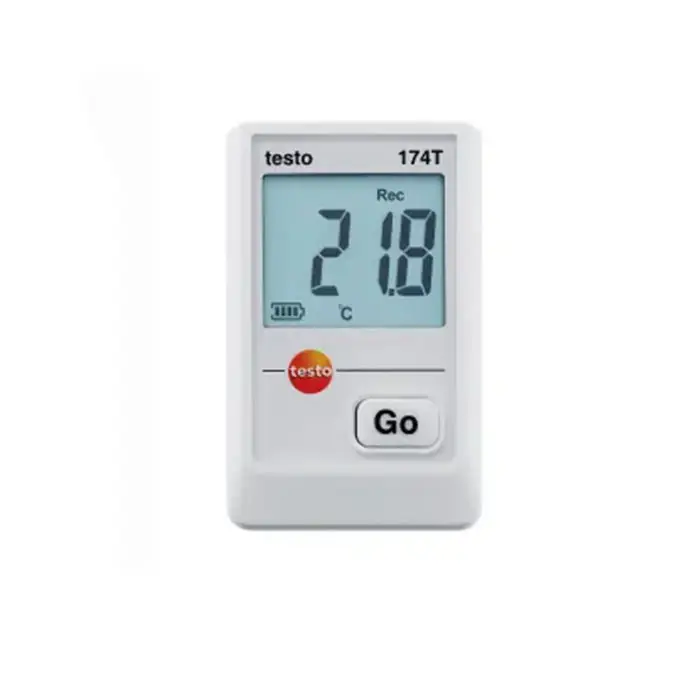
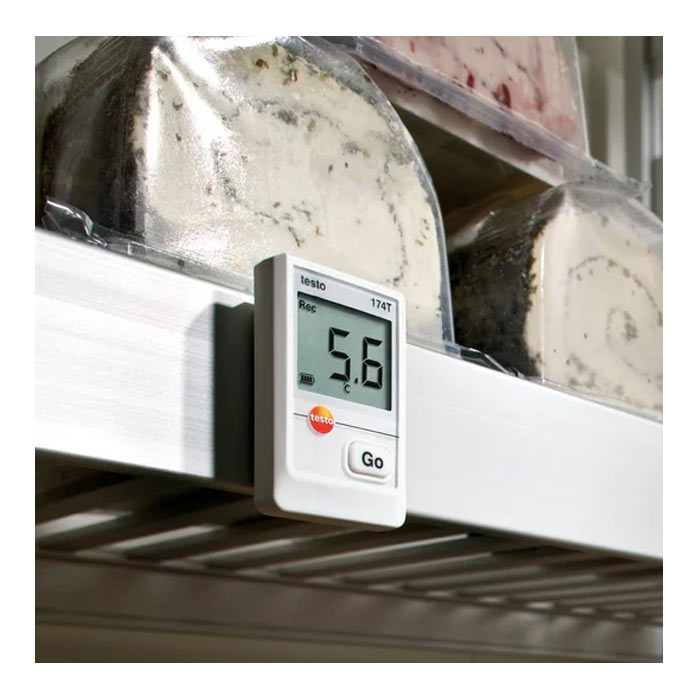
$359.00 (excl.VAT)testo 174 T An Absolute Mini temperature data logger
$281.00 (excl.VAT)Hioki IR4056-20 Insulation Tester
$0.00 (excl.VAT)Hioki Dt4256 Digital Multimeter
$0.00 (excl.VAT)Extech CG304 Coating Thickness Tester with Bluetooth
$0.00 (excl.VAT)Megger Mit525 UK Insulation Resistance Tester
$0.00 (excl.VAT)Kyoritsu KEW 1009 Digital Multimeter
$0.00 (excl.VAT)Megger MIT2500 Insulation Tester
$0.00 (excl.VAT)
Whether you’re conducting a home inspection, a building survey, installing flooring, or addressing flood damage, using the right tools effectively is key to achieving successful results.
Modern moisture meters have become highly advanced, offering precision in detecting and measuring moisture levels within a space. These professional-grade devices are indispensable for identifying, quantifying, and analyzing the presence of moisture in a variety of materials. For any inspector, mastering the proper use of a moisture meter is vital for spotting potential issues and delivering accurate evaluations. After all, what use is a tool if you don’t know how to operate it?
While turning on the device and placing it against the material for a reading might seem straightforward, the mechanics of how a moisture meter works go beyond these basic steps. More importantly, understanding how the readings are generated and what they signify is essential (whether you’re making decisions on-site or preparing a detailed inspection report).
This guide will explore the key aspects of how moisture meters function, providing insights into how you can take reliable and consistent measurements with confidence.
WME (Wood Moisture Equivalent): The Basis of Moisture Meter Readings
For most moisture meters, Wood Moisture Equivalent (WME) serves as the fundamental standard for measuring the actual moisture content of various materials.
But why do we use WME?
Before diving into why it’s used, let’s first understand: What exactly is WME? In technical terms, WME refers to the theoretical percentage of moisture content that a piece of wood would reach if it were in contact with or near a material in moisture equilibrium.
To put it simply, WME provides a consistent way to represent the moisture content of any material as if it were wood, making it easier to compare and interpret readings across different substances.
Why is WME the Foundation of Moisture Content Readings in Moisture Meters?
The reason Wood Moisture Equivalent (WME) is at the core of moisture meter readings boils down to three key factors:
- Consistent Electrical Conductivity Across Wood Types
Despite variations between species like oak and maple, wood generally shares similar levels of electrical conductivity. This consistency makes wood a reliable baseline for moisture measurements across materials. - Hygroscopic Nature of Wood
Wood is an organic, hygroscopic material, meaning it constantly interacts with its surroundings by absorbing or releasing moisture to reach equilibrium with the environment. For example, a wooden door swelling on a humid summer day demonstrates this process in action. This property makes wood a practical reference point for gauging moisture in other materials. - Indicator of Microbial Growth Risk
Damp wood provides a conducive environment for microbial growth, such as mold. By measuring moisture relative to wood, inspectors can better assess the likelihood of mold growth in other materials that also support microbial activity.
In essence, the natural characteristics of wood and its interaction with moisture act as a universal “barometer,” ensuring moisture readings are accurate and comparable across different materials. WME not only levels the playing field but also simplifies comparisons between materials, providing meaningful insights into moisture content.
Wood Moisture Equivalent Across Materials
Comparing Drywall and Concrete: Why WME Simplifies Moisture Measurement
Drywall and concrete are fundamentally different materials, both in purpose and in how they interact with moisture.
Drywall is highly susceptible to immediate damage from moisture due to its composition. Excess moisture can cause it to warp, weaken, or even lead to mold growth in a short time.
Concrete, on the other hand, is much more resilient. It can appear dry on the surface while still retaining significant moisture content—often in the form of vapor—by WME standards.
However, excessive moisture in concrete can pose serious risks to surrounding materials. For instance, drywall or wood baseboards in contact with concrete may absorb moisture and become saturated, leading to damage or microbial growth even if the concrete itself shows no visible signs of wetness.
How WME Simplifies the Process
Without WME, measuring and interpreting moisture levels across materials would require multiple material-specific reference charts and extensive calculations to compare readings. This process would be not only tedious but prone to inconsistencies.
Thanks to WME, all moisture measurements are standardized using one universal scale. A single WME chart is sufficient to interpret readings across materials, streamlining the process and making it easier to provide accurate and actionable insights.

Equilibrium Moisture Content (EMC): Materials, Moisture, and Measurement
Let’s revisit our earlier example, where materials like wooden baseboards or drywall can become saturated when exposed to excessive moisture from nearby concrete. This phenomenon ties directly to equilibrium moisture content (EMC).
The Connection Between WME and EMC
A discussion about Wood Moisture Equivalent (WME) isn’t complete without addressing EMC, as the two concepts are closely linked and often confused. While WME provides a way to compare moisture levels across different materials, EMC explains how moisture moves within a material and its surroundings.
What is EMC?
Equilibrium Moisture Content (EMC) is the point at which a material stops absorbing or releasing moisture because it has reached a balance with the humidity in the surrounding environment. In simpler terms, it’s when a material (like wood or drywall) achieves the same moisture content as the air around it.
EMC in Action
The concept of EMC is most commonly associated with wood and wood flooring. Since wood is hygroscopic, it continuously interacts with its environment, absorbing or releasing moisture depending on the surrounding humidity. This is why wood compresses or expands as environmental conditions change.
For example, when hardwood flooring is being installed, the lumber is often left at the installation site for a few days. This allows the wood to adjust to the local humidity and reach equilibrium with the space. Once this balance is achieved, the flooring is less likely to warp, shrink, or shift after installation, ensuring a proper fit despite humidity fluctuations.
The same principle applies to other materials like drywall or plaster, which also adjust their moisture content to match the conditions of their environment. Understanding EMC is essential for minimizing material-related issues and ensuring stability in applications like flooring, building construction, or restoration projects.
Why EMC Matters in Moisture Inspections
Equilibrium Moisture Content (EMC) isn’t the definitive answer to identifying moisture issues, but it offers valuable insight into how materials respond to environmental moisture.
While EMC readings alone won’t pinpoint the source of a moisture problem, they can reveal whether excessive moisture is present in a space. By using a thermo-hygrometer to measure temperature and humidity, then cross-referencing the data with an EMC chart, inspectors can identify potential moisture concerns that may require further investigation.
How to Measure WME vs. EMC
Though Wood Moisture Equivalent (WME) and Equilibrium Moisture Content (EMC) measure different aspects of moisture, the methods for collecting data are similar, with one key difference: time.
Taking WME Readings
To measure WME, use a pin-type moisture meter. Interestingly, taking a standard moisture content reading with a pin-type meter is effectively a WME reading. The process is straightforward and takes just a few seconds.
Measuring EMC
Measuring EMC requires a longer and more detailed process:
- Use a pin-type moisture meter to record the material’s actual moisture content over several days.
- Simultaneously, use a thermo-hygrometer to measure the space’s relative humidity (RH) (a combination of temperature and humidity).
- Compare the material’s moisture content with the relative humidity data using an EMC chart.
Changes in both moisture content and RH over time can indicate potential problems. However, these fluctuations might also reflect natural environmental changes, such as a humid climate or a seasonal shift.
When to Investigate Further
In warm, humid regions or during seasonal transitions, changes in EMC readings may simply result from environmental factors. The real red flag occurs when your moisture and RH readings don’t align with the weather forecast or expected seasonal conditions. This discrepancy is often a sign of hidden moisture issues that demand further exploration.
Understanding EMC alongside WME helps inspectors uncover hidden moisture risks, ensuring a thorough and accurate assessment of the space.

Putting Your Moisture Meter to Work: Options and Functionality
When conducting a moisture inspection, simply grabbing the nearest tool isn’t enough. As the saying goes, “use the right tool for the right job.” This principle holds true in moisture surveys, where choosing the correct moisture meter is essential for accurate results.
Different types of moisture meters and their specific applications
Non-Invasive (Pinless) Moisture Meters
Pinless moisture meters are non-invasive, meaning they don’t damage or penetrate the material being tested. Instead, they use electrical conductance to measure the average moisture content within the material’s depth of measurement.
Key Features and Applications
- Surface-Friendly: Ideal for materials where maintaining the surface integrity is important, such as finished wood or drywall.
- Moisture Presence Detection: Pinless meters don’t provide exact moisture content readings but can confirm the presence of moisture.
- Quick Scanning: These meters are great for initial inspections, helping to locate areas of concern quickly. For example, they can detect potential moisture issues beneath flooring, behind wall coverings, or in inaccessible areas.
Pinless moisture meters are particularly useful for identifying potential problem zones that require further investigation with more precise tools. They are a valuable first step in a comprehensive moisture survey.
Pin-Type Moisture Meters
Pin-type moisture meters are designed to measure actual moisture content in a material through direct contact. Equipped with sharp electrodes (pins), these devices determine moisture levels by assessing the electrical resistance between the probes.
How It Works
- Moisture Conductivity: Since water conducts electricity, lower resistance indicates higher moisture content. Essentially, the easier it is for electricity to flow between the probes, the more moisture is present in the material.
- Accuracy: These meters provide highly accurate moisture content readings for wood and WME (Wood Moisture Equivalent) values for various building materials.
Key Applications
- Confirmation Tool: Pin-type meters are typically used to validate readings detected by pinless meters.
- Excessive Moisture Detection: Their ability to quantify moisture makes them a critical tool for confirming problematic moisture levels.
Hygrometers
Hygrometers are a specialized type of moisture meter designed to measure relative humidity (%RH) rather than the moisture content of materials.
How It Works
- Hygrometers assess a space’s ambient moisture and temperature conditions, which are combined into the %RH measurement.
Key Applications
- Identifying Problem Areas: During the initial stages of a moisture survey, hygrometers help pinpoint areas with potential issues.
- Monitoring Remediation Efforts: During moisture remediation, hygrometers track the effectiveness of drying and dehumidifying processes. For example:
- Checking if dehumidifiers are reducing %RH.
- Ensuring the space’s ambient conditions are stabilizing.
- Post-Damage Verification: They provide proof that a space’s humidity levels have returned to their pre-loss state, ensuring compliance with remediation standards.
The Basics of Moisture Meter Use in Inspections
Conducting an effective moisture inspection requires not just the right tools but also a proper understanding of their functionality and the inspection process. Here are the foundational practices every inspector should follow when using a moisture meter:
1. Understand Your Meter’s Purpose
A common misconception is that a moisture meter serves as an analytical tool. In reality, it is a diagnostic aid to guide decision-making during an inspection.
- High Readings = Further Investigation: High readings from your moisture meter don’t necessarily indicate moisture alone. Materials like metals and salts can produce false positives. Use the readings as a starting point for a deeper investigation.
2. Take Multiple Measurements
Always take at least two or three readings at the same location.
- Why? Multiple readings validate your initial results, ensuring the accuracy of your findings. This redundancy helps eliminate potential outliers caused by irregularities in the material or external factors.
3. Perform a Visual Inspection First
Before taking any moisture readings, perform a thorough walkthrough of the inspection area.
- Look for:
- Stains or discoloration on walls, ceilings, and floors.
- Cracked surfaces that may hint at underlying moisture issues.
- Signs of warping or buckling in wood or flooring materials.
- Visual clues provide context, guiding where to take measurements.
4. Establish a Baseline with Dry Materials
Identify a dry area or material within the building and use it as your baseline for comparison.
- Why? Baseline readings give you a reference point, allowing you to determine if other areas in the building have higher-than-normal moisture content.
5. Calibrate Your Meter Before Each Use
Ensure your moisture meter is properly calibrated before every inspection.
- Benefits of Calibration:
- Guarantees accurate measurements.
- Prevents misinterpretation of data due to device drift or errors.
- Many modern meters include quick calibration features, taking just a few seconds to complete.
6. Leverage Meter Attachments
Take advantage of your moisture meter’s specialized attachments to optimize measurements for specific conditions.
- Examples:
- Extension Probes: Ideal for hard-to-reach areas, like behind cabinets or inside wall cavities.
- Deep Wall Probes: Useful for assessing moisture levels deep within materials, such as insulation or concrete.
Calibrating Your Moisture Meter
Calibrating your moisture meter is a simple yet crucial task to ensure accurate readings during your inspections. Regular calibration checks are part of proper maintenance, guaranteeing that your meter works as intended and provides reliable data.
Pinless Moisture Meters
Pinless moisture meters are typically used for non-invasive measurements, meaning they measure moisture levels without penetrating the material. Since their readings are relative, calibration isn’t as straightforward as with pin-type meters. However, there are some basic steps to check their functionality.
- Basic Test:
- Zero Reading: In open air, the meter should show a reading of zero moisture.
- Maximum Reading: When placed against the palm of your hand, the reading should reach 999.
- Advanced Calibration:
- Some advanced models allow you to check and recalibrate the meter via their software. Regularly checking these meters for calibration will ensure more accurate results when inspecting materials like drywall, wood, or concrete.
Pin-Type Moisture Meters
Pin-type moisture meters are designed to measure actual moisture content by measuring the electrical resistance between two pins inserted into the material. This type of meter is generally more precise and easier to calibrate compared to pinless meters.
- Calibration Process:
- Most digital pin-type meters come with a Moisture Content Standard (MCS). The MCS is a material or device specifically designed to test the accuracy of the meter’s readings.
- Steps to Calibrate:
- Insert the Meter Pins: Touch the meter’s pins to the MCS’s contact points.
- Wait for the Reading: After a few seconds, the meter should display a WME reading within ±18% of the standard moisture content .
- Interpret the Results: If the meter shows a reading outside of this range, it indicates that the meter may need recalibration or there could be an issue with the pins or electronics.
Taking Measurements & Interpreting Their Meaning
Understanding how to take accurate moisture measurements and interpreting their results is key to using moisture meters effectively during inspections. Whether you’re using a pinless or pin-type meter, knowing how to use the readings to guide your investigation is crucial for a successful moisture survey.
Pinless Moisture Meters
Pinless moisture meters are non-invasive, meaning they don’t penetrate the material. Instead, they detect moisture levels by measuring the conductivity of the material, offering a general idea of moisture distribution without damaging the surface.
- Taking a Reading:
- Power on the Meter: Turn on the meter and place it on the surface of the material you’re testing.
- Read the Display: Within a few seconds, the meter will display a result indicating the presence of moisture.
- What the Reading Means:
- The reading from a pinless meter is qualitative, meaning it helps you locate moisture but doesn’t give a precise moisture content percentage.
- These readings indicate areas of potential concern, but should always be confirmed with a pin-type meter for accuracy and to get actual moisture content data.
Pin-Type Moisture Meters
Pin-type moisture meters are designed to provide precise measurements of moisture content, including the wood moisture equivalent (WME) in various building materials, by measuring the electrical resistance between the pins.
- Taking a Reading:
- Power on the Meter: Turn on the meter and place the pins in direct contact with the material.
- Get the Measurement: The meter will display a percentage reading within seconds. It’s important to note that you don’t need to force the pins into the material—light contact is sufficient for an accurate reading.
- What the Reading Means:
- Pin-type meters provide quantitative measurements, meaning they give you a precise percentage of moisture content in the material.
- These readings are essential for determining the severity of moisture problems. A higher percentage indicates a higher moisture level, which may suggest potential issues like mold growth, wood rot, or other moisture-related damages.
- Pin-type readings can guide further investigation or remediation, as they give specific data on material moisture.
Hazards That Impact Moisture Meter Readings
Understanding how to properly use a moisture meter is just one part of the equation. Equally important is being aware of the factors that can compromise your readings. Several external factors and environmental conditions can affect the accuracy of moisture measurements, leading to misleading results. Here are some of the most common hazards that can impact moisture meter readings:
1. Metal
Metal is a moisture meter’s worst enemy. Because metals are highly conductive, they can create false readings when the meter comes into contact with them. In some cases, the presence of metal may cause areas that are actually dry to register as extremely moist. This is particularly problematic in buildings with hidden metal components, such as pipes, rebar, or electrical wiring behind walls and flooring. To avoid this hazard, always be mindful of possible metal obstructions when taking readings.
2. Salts
Salts, often found as efflorescence on damp materials, can significantly affect moisture meter readings. When moisture evaporates, it leaves behind mineral salts that increase the water retention of the material. Salts also make water more conductive, which can distort moisture readings, especially when using a pin-type meter that measures electrical resistance. This means that materials with salt buildup may appear wetter than they actually are, leading to false positive readings.
3. An Uncalibrated Meter
While it’s less common with professional-grade moisture meters, uncalibrated meters can result in inaccurate readings. Calibration ensures that the device is functioning properly and taking accurate measurements. If your meter has been in use for a while, it’s important to regularly check its calibration to ensure accuracy. Calibration errors can cause unreliable results, which is especially problematic when trying to identify moisture issues that may require remediation.
4. Temperature
For multi-functional moisture meters that combine pinless, pin-type, and hygrometer capabilities, temperature fluctuations can negatively impact readings. This is particularly true when the device is measuring ambient humidity or grains-per-pound. A sudden change in temperature—such as from an open window, a heater turning on, or the meter being stored in an area with different conditions—can cause discrepancies in moisture measurements. Similarly, large differences in temperature between the meter and the material being tested can also skew results. It’s important to avoid drastic temperature changes and ensure your meter is acclimated to the testing environment for accurate readings.
5. Surface-Level Condensation
Condensation is often a result of temperature differences between the material being tested and the surrounding environment. This issue can give your moisture meter the wrong impression about moisture levels. Pin-type meters may show higher moisture readings due to the conductive nature of water that forms on the surface. On the other hand, non-invasive moisture meters might show lower readings because condensation is outside the material’s depth of measurement. To avoid this hazard, always ensure the material is dry and free of condensation before taking measurements.
6. User Experience
One of the simplest yet most common reasons for inaccurate moisture readings is user error. Proper training and familiarity with your moisture meter’s capabilities are essential for reliable measurements. Some common mistakes include:
- Using non-invasive meters incorrectly: Not all non-invasive meters can take accurate readings through certain materials like vinyl or thick coatings. Ensure you’re using the appropriate tool for the material being tested.
- Incorrect use of pin-type meters: Pin-type meters require light contact with the surface being tested. Forcing the probes beneath the surface can result in incorrect readings, especially when testing materials like drywall. Always ensure the probes are making contact only with the material’s surface to get accurate readings.
Troubleshooting Your Professional Moisture Meter
Professional moisture meters, like any other device, may occasionally encounter functionality issues. While such malfunctions are rare, they can happen from time to time, much like a computer or car that experiences minor glitches. Fortunately, most issues with moisture meters are simple and can be quickly addressed. Here’s a troubleshooting checklist to help you get your device back to normal operation:
1. Batteries
A common reason why your moisture meter might stop working is dead batteries. It’s one of the most frequent and preventable issues, but it can catch you off guard in the middle of a job. Here’s how to avoid battery-related issues:
- Double-check the meter’s power: Before heading out for a job, ensure your meter is powered on and functioning correctly.
- Carry spare batteries: Always have backup batteries on hand so you’re not left without a working meter.
- Inspect the battery contacts: If the meter isn’t turning on, check for corrosion caused by leaking batteries. This can sometimes prevent the device from powering on or functioning properly.
2. External & Internal Damage
While professional moisture meters are built to be durable, they are not indestructible. If your meter stops working as expected, checking for physical damage is an essential step. Both external and internal damage can affect the meter’s performance.
External Damage
Perform a visual inspection to identify any of the following issues:
- Bent pins (for pin-type moisture meters)
- Cracked casing that may expose sensitive components
- Deep scratches or gouges on the surface
- Worn-out contact plate (for pinless moisture meters), which may prevent accurate measurements
- Broken digital display, making it difficult or impossible to read results
Internal Damage
In addition to external damage, it’s important to check for internal issues that may be affecting the functionality of the meter. Here’s how you can check:
- Shake the meter gently: If you hear a rattling noise or feel any residual movement, it’s likely that there’s internal damage, such as a detached wire or a damaged circuit board.
- Look for signs of internal malfunctions: If the meter exhibits strange behavior (e.g., inaccurate readings, non-responsive buttons), internal components might be compromised.
3. Out-of-Date Firmware
Most modern moisture meters feature firmware—the software that controls how the device functions. Just like a smartphone or computer, the firmware on your moisture meter can become outdated, leading to bugs or suboptimal performance. Manufacturers often release firmware updates to improve functionality or fix issues.
To ensure your moisture meter is functioning at its best:
- Check for firmware updates: Periodically visit the manufacturer’s website or contact customer support to see if there are any new firmware updates available for your meter.
- Install updates as needed: Keeping your meter’s firmware current ensures it operates smoothly and that you benefit from any enhancements or fixes the manufacturer has implemented.


 Bench Multimeters