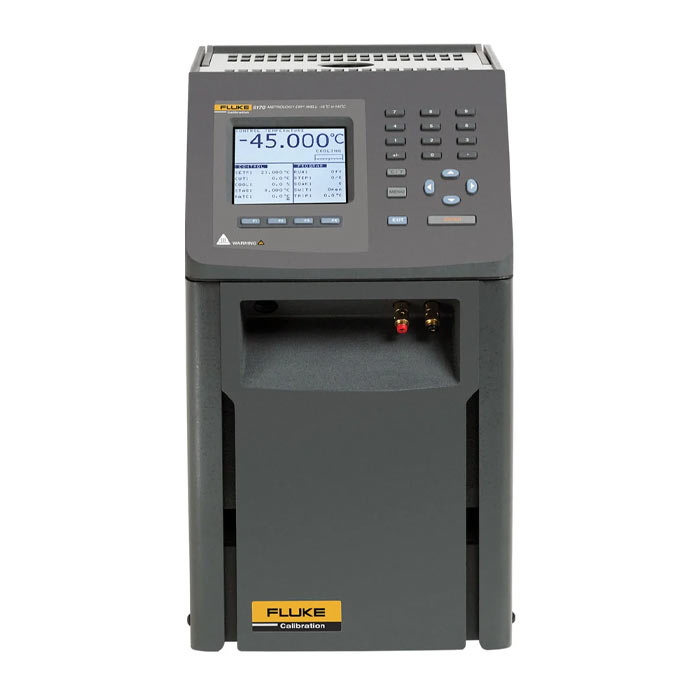

Fluke 9170A Field Metrology Well
The Fluke 9170A Field Metrology Well Insert “A”, made of aluminum with miscellaneous holes, is a versatile tool designed for precise temperature calibration across a wide range. Capable of temperatures ranging from -45°C to 140°C, this insert provides exceptional accuracy and stability for various calibration applications.
Call for Price
We are not Supporting COD Payments Terms Outside UAE
Fluke Calibration 9170-A Field Metrology Well Insert “A”, Al, Misc Holes
–45°C to 140°C
The Fluke 9170A Field Metrology Well Insert “A”, made of aluminum with miscellaneous holes, is a versatile tool designed for precise temperature calibration across a wide range. Capable of temperatures ranging from -45°C to 140°C, this insert provides exceptional accuracy and stability for various calibration applications.
Constructed with high-quality aluminum material, the 9170-A insert ensures reliable and consistent performance. Its miscellaneous holes offer flexibility, allowing for the calibration of a diverse range of temperature sensing instruments.
Whether used in laboratories, manufacturing facilities, or field settings, the Fluke Calibration 9170-A Field Metrology Well Insert “A” delivers reliable and accurate temperature calibration, making it an indispensable tool for metrology professionals and technicians.
fluke 9170 series
The Model 9170 stands out in the series by attaining the lowest temperatures, reaching as low as -45°C even under normal room conditions. With a stability rating of ±0.005°C across its entire temperature range (up to 140°C) and an immersion depth of 160 mm (6.3 in), it offers remarkable precision. Featuring axial uniformity of ±0.02°C and radial uniformity of ±0.01°C, this model boasts outstanding uncertainty budgets, making it an ideal choice for a wide range of pharmaceutical and other applications.
Fluke 9170A Specifications:
| Specifications | |||
| Range (at 23°C ambient) | –45°C to 140°C (–49°F to 284°F) | ||
| Display accuracy | ±0.1°C full range | ||
| Stability | ±0.005°C full range | ||
| Axial uniformity | ±0.1°C at –45°C ±0.04°C at –35°C ±0.02°C at 0°C ±0.07°C at 140°C |
||
| Radial uniformity | ±0.01°C full range | ||
| Loading effect (with a 6.35 mm reference probe and three 6.35 mm probes) | ±0.02°C at –45°C ±0.005°C at –35°C ±0.01°C at 140°C |
||
| Hysteresis | 0.025°C | ||
| Well depth | 160 mm (6.3 in) | ||
| Resolution | 0.001°C | ||
| Display | LCD, °C or °F, user-selectable | ||
| Key pad | Ten key with decimal and ± button. Function keys, menu key, and °C / °F key. | ||
| Cooling time | 44 min: 23°C to –45°C 19 min: 23°C to –30°C 19 min: 140°C to 23°C |
||
| Heating time | 32 min: 23°C to 140°C 45 min: –45°C to 140°C |
||
| Size (H x W x D) | 366 x 203 x 323 mm (14.4 x 8 x 12.7 in) | ||
| Weight | 14.2 kg (31.5 lb) | ||
| Power | 115 V AC (±10%), or 230 V AC (±10%), 50/60 Hz, 550 W |
||
| Computer interface | RS-232 Interface with 9930 Interface-it control software included | ||
| Traceable calibration (NIST) | Data at –45°C, 0°C, 50°C, 100°C, and 140°C | ||
| Specifications | Built-in Reference Input | ||
| Temperature range | –200°C to 962°C (–328°F to 1764°F) | ||
| Resistance range | 0 Ω to 400 Ω, auto-ranging | ||
| Characterizations | ITS-90 subranges 4, 6, 7, 8, 9, 10, and 11 Callendar-Van Dusen (CVD): R0, a, b, d | ||
| Resistance accuracy | 0 Ω to 20 Ω: 0.0005 W 20 Ω to 400 Ω: 25 ppm |
||
| Temperature accuracy (does not include probe uncertainty) |
10 Ω PRTs: ±0.013°C at 0°C ±0.014°C at 155°C ±0.019°C at 425°C ±0.028°C at 700°C |
25 Ω and 100 Ω PRTs: ±0.005°C at –100°C ±0.007°C at 0°C ±0.011°C at 155°C ±0.013°C at 225°C ±0.019°C at 425°C ±0.027°C at 661°C |
|
| Resistance resolution | 0 Ω to 20 Ω: 0.0001 Ω 20 Ω to 400 Ω: 0.001 Ω |
||
| Measurement period | 1 second | ||
| Probe connection | 4-wire with shield, 5-pin DIN connector | ||
| Calibration | NVLAP accredited (built-in reference input only), NIST-traceable calibration provided | ||
You must be logged in to post a review.
Brand
Fluke
Related Products
Fluke Calibration 9142A : an Epic Field Metrology Well
In stock
Fluke Calibration 9143: an epic Field Metrology Well
In stock
Fluke Calibration 9100S: An epic Handheld Dry-Well
In stock
Fluke 712B RTD Calibrators
In stock


Reviews
Clear filtersThere are no reviews yet.